

Introduction to Raspberry Pi and Docker
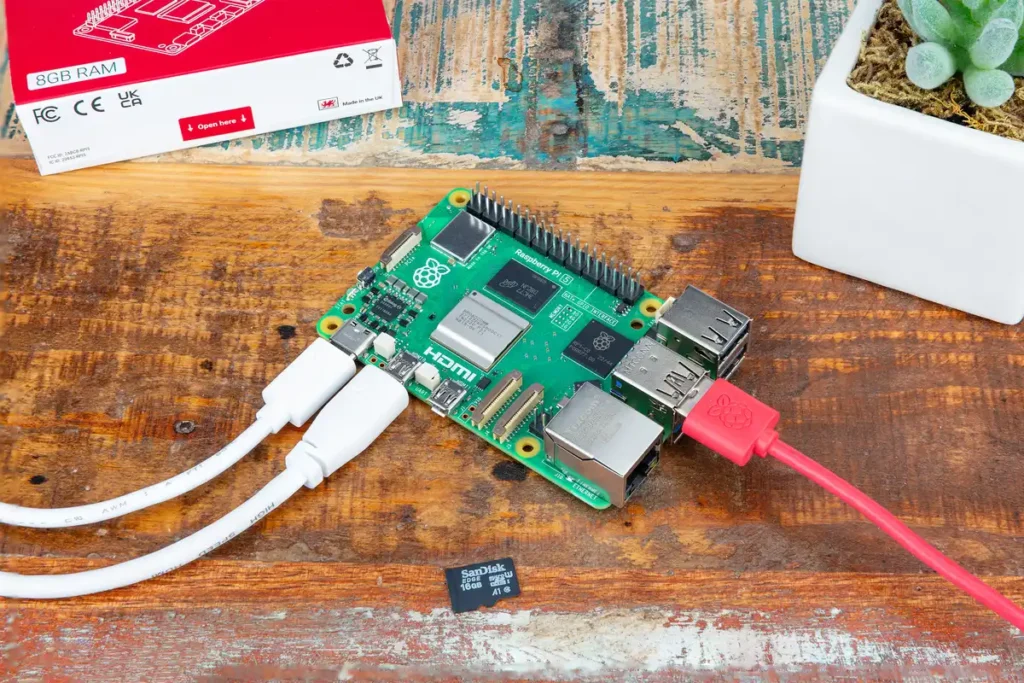
The Raspberry Pi 5 is the original small, affordable computer about the size of a credit card. Designed primarily for educational purposes, it has evolved into a versatile tool for various applications. Its compact size, low power consumption, and different I/O options make the Raspberry Pi an ideal platform for home projects.
Docker is a powerful platform that simplifies the creation, deployment, and management of containerized applications. By utilizing containers, developers can package their applications along with all necessary dependencies, ensuring that they run seamlessly across different environments. This containerization enables efficient resource usage. It also enhances security by isolating applications from eachn other. The Docker ecosystem provides many container images for you to explore.
What’s stopping you? Click on this link to grab your Raspberry Pi 5 kit today and dive into the incredible adventure that is building your own home computer lab along with me.
Now that you have your Raspberry Pi, let’s get things up and running. Luckily, the folks over a the Raspberry Pi Foundation have made the Raspberry Pi Imager. This tool will download the correct OS image and install it on your SD card.
Preparing Your Raspberry Pi 5
First, confirm that you have all necessary hardware components. A Raspberry Pi 5, a reliable power supply (rated at 5V/3A), a microSD card (try this one), and a keyboard, mouse, and monitor for initial configuration.
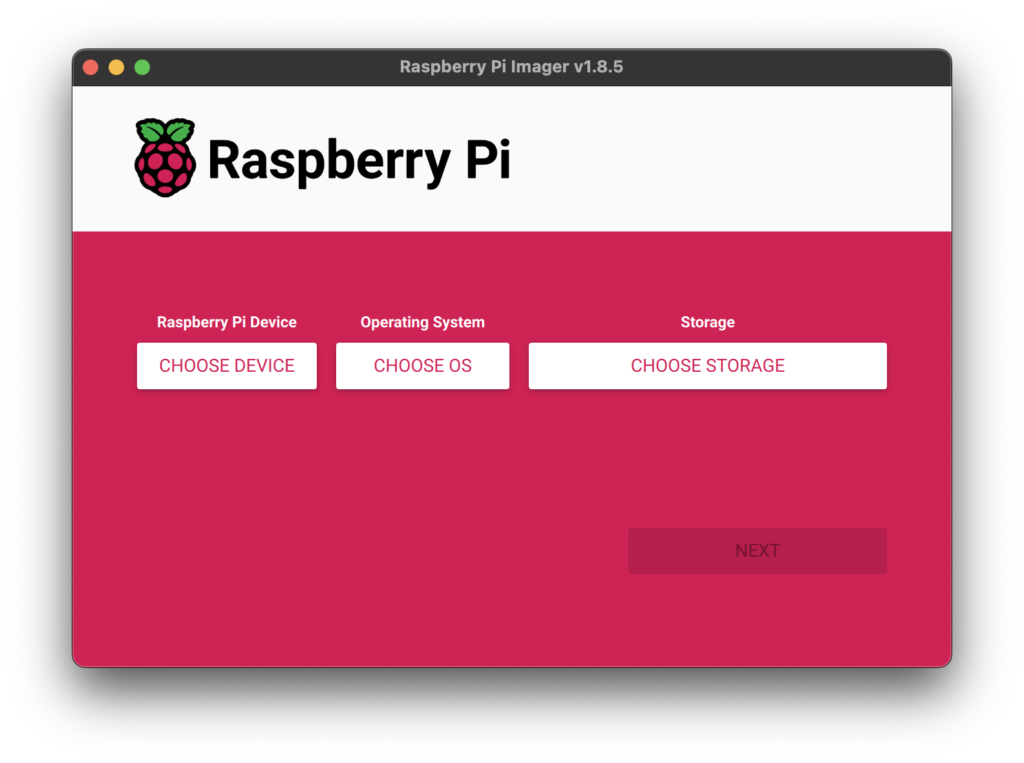
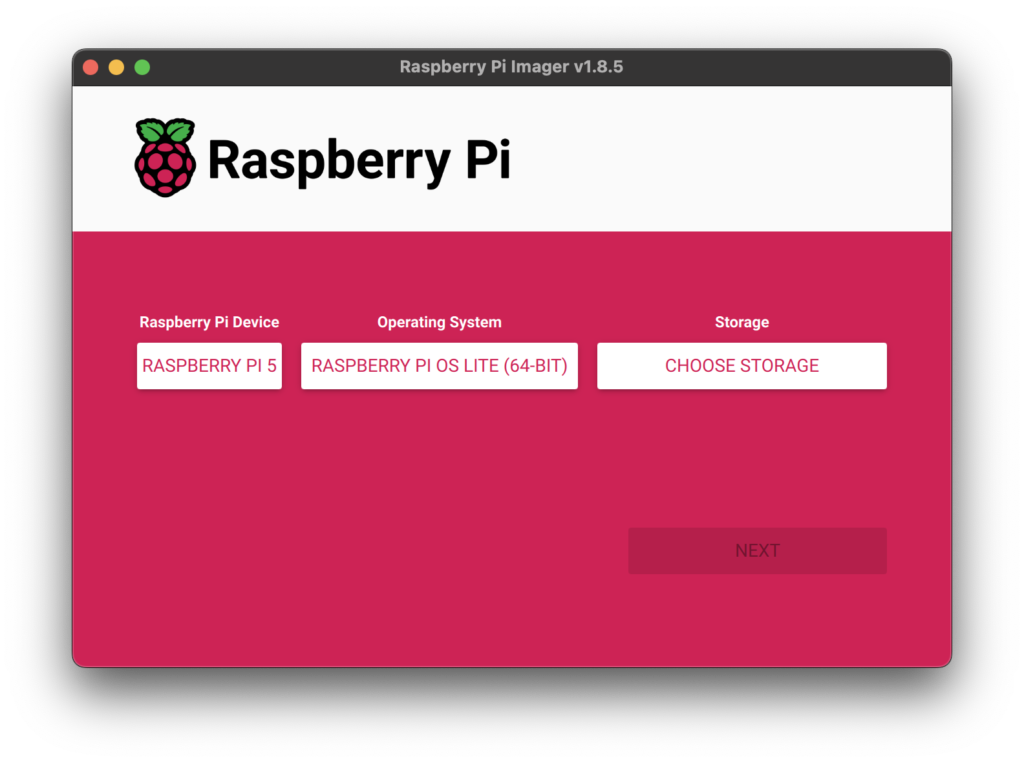
Now, you’ll need to jump over to https://raspberrypi.com/software/ and download the Raspberry Pi Imager. Running the imager is simple, let’s launch it and walk through the process.
- Select the type of Raspberry Pi you are using, in our case Raspberry Pi 5
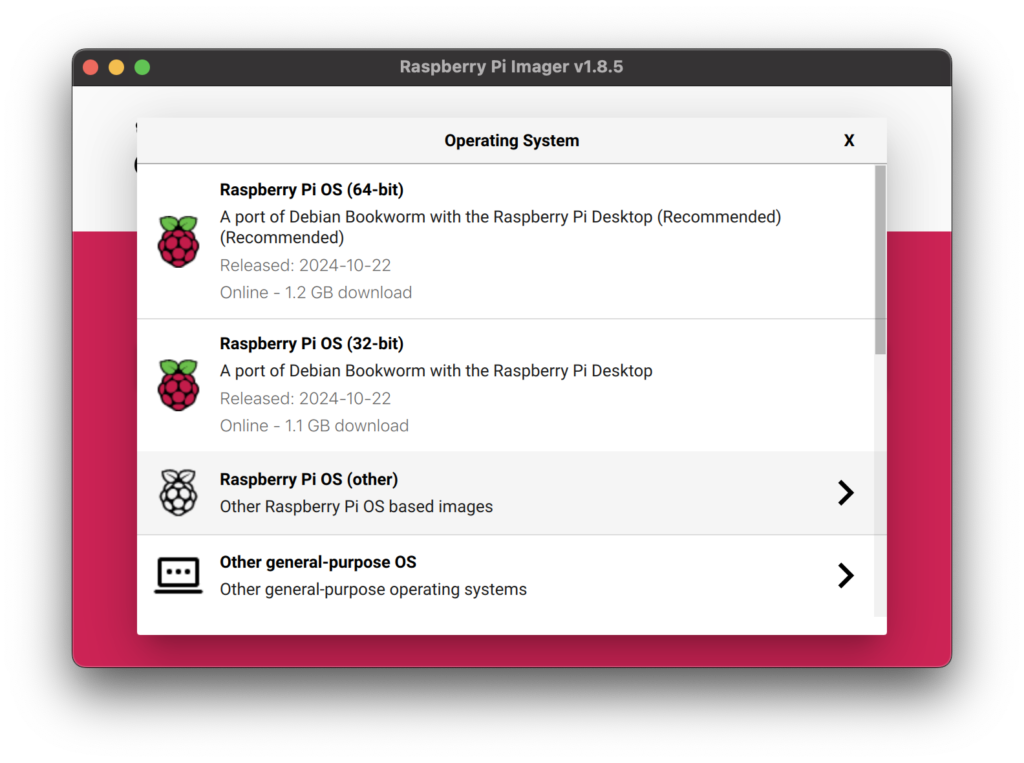
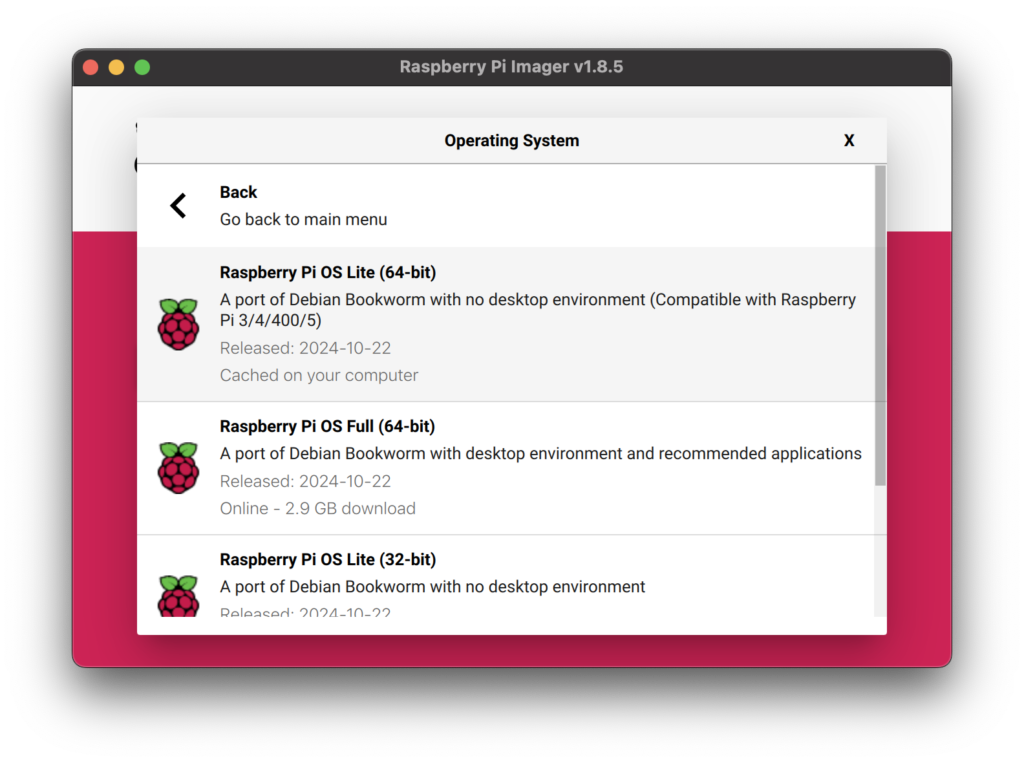
- Select your OS, we will choose Raspberry Pi OS (other) and then Raspberry Pi OS Lite (64-bit).
- Choose your Storage device. Make sure to select the correct SD card device!
Upon successful writing of the your Raspberry Pi OS to the microSD card, insert it back into the Raspberry Pi 5. Power up your device and watch the magic happen. You’ll see a bunch of text scroll by on the screen. This is a list of processes and system checks that occur when you start Raspberry Pi OS. Once complete, you should see a login prompt. Let’s login and finish configuring our OS.
Now that we are logged in, update the OS and any preinstalled software.
sudo apt update && sudo apt upgrade -yThis command will check for the latest software updates, and then install them without asking your confirmation. For a more thorough update, you can also use:
sudo apt full-upgradeThis command not only upgrades the existing packages but also installs new dependencies and removes obsolete ones, making sure your system is as streamlined as possible for optimal compatibility with Docker.
Once you complete the updating and upgrading process, reboot your Raspberry Pi with:
sudo reboot nowThis ensures that all the updates take effect. Keeping your Raspberry Pi OS up-to-date is a vital step in preparing a secure and stable environment for your upcoming Docker installation.
Installing Docker on Raspberry Pi 5
Setting up Docker on a Raspberry Pi 5 is straightforward and will only take a few minutes to complete.
First we need to add the Docker apt repository to our list by running these commands:
# Add Docker's official GPG key:
sudo apt-get update
sudo apt-get install ca-certificates curl
sudo install -m 0755 -d /etc/apt/keyrings
sudo curl -fsSL https://download.docker.com/linux/debian/gpg -o /etc/apt/keyrings/docker.asc
sudo chmod a+r /etc/apt/keyrings/docker.asc

# Add the repository to Apt sources:
echo \
  "deb [arch=$(dpkg --print-architecture) signed-by=/etc/apt/keyrings/docker.asc] https://download.docker.com/linux/debian \
  $(. /etc/os-release && echo "$VERSION_CODENAME") stable" | \
  sudo tee /etc/apt/sources.list.d/docker.list > /dev/null
sudo apt-get update
# Install Docker
sudo apt-get install docker-ce docker-ce-cli containerd.io docker-buildx-plugin docker-compose-pluginUpon successful completion, you can check if Docker is installed correctly by running:
sudo docker run hello-worldAfter ensuring Docker is installed, add your user to the ‘docker’ group. This will allow you to run Docker commands without needing sudo privileges, enhancing your workflow. Use the following command:
sudo usermod -aG docker $USERLog out and back in for the group changes to take effect. To verify that Docker is running appropriately, execute:
sudo docker run hello-worldThis command downloads the ‘hello-world’ Docker image and runs it, confirming that everything is functioning properly. With Docker installed, you can now begin exploring containerizing, optimizing your projects on the Raspberry Pi 5.
Understanding Docker Images and Containers
Docker operates using two fundamental components: images and containers. Understanding these concepts is crucial for effectively utilizing Docker. A Docker image a lightweight, standalone, executable package that contains all the necessary code, libraries, dependencies, and runtime components needed to run a specific software application.
On the other hand, a Docker container is a running instance of a Docker image. It is an encapsulated environment that can be executed, modified, or replicated as required. Containers share the operating system kernel with other containers but work in isolation, which ensures that they do not interfere with one another. This decoupling enhances system efficiency and promotes seamless application deployment across diverse environments.
Essentially, images serve as templates from which containers are instantiated. Images are typically stored in registries, such as Docker Hub, where users can search for existing images or share their custom creations. For Raspberry Pi, it is essential to select ARM-compatible Docker images, as the architecture differs from traditional x86 systems commonly used in servers and desktops. Examples of popular Docker images suitable for Raspberry Pi include nginx, a high-performance web server; mySQL, a widely-used relational database management system; and python, an image tailored for running Python applications.
Running Your First Docker Container
Once you have successfully installed Docker on your Raspberry Pi 5, the next step is to run your first Docker container. This process involves pulling a Docker image from the Docker Hub, launching a container from that image, and verifying its functionality. This guide will utilize the popular Nginx web server image as an example.
To begin, you will need to pull the Nginx image. Open your terminal and execute the following command:
docker pull nginxThis command instructs Docker to retrieve the latest version of the Nginx image from Docker Hub. Depending on the speed of your internet connection, this may take a few moments. Once the image is downloaded, you can verify it by listing your available images using the command:
docker imagesAfter confirming that the Nginx image is present, the next step is to run your first container. To do this, execute the following command, which will start a container from the Nginx image:
docker run -d -p 80:8080 nginxIn this command, the `-d` option runs the container in detached mode, and the `-p 80:8080` option maps port 80 of the container to port 8080 on your Raspberry Pi. The container will now be running in the background.
Now, to ensure that the container is operational, open a web browser and navigate to your Raspberry Pi’s IP address. You should see the default Nginx welcome page, confirming that your Docker container is up and running. If you wish to check the container logs to troubleshoot or gather information, use the command:
docker logs <container_id>Replace <container_id> with the actual ID of your running container, which you can find by executing the command:
docker psdocker ps will list all of the running containers so you can note the container id with ease.
Managing Docker Containers
Once you have successfully launched Docker containers on your Raspberry Pi 5, managing them becomes an essential task. Docker provides a simple and effective command-line interface to interact with your containers, allowing you to start, stop, restart, and remove them as needed. To start a container, use the command docker start , while stopping a running container can be accomplished with <container_name>docker stop . If a situation arises where you need to restart a container, the command <container_name>docker restart <container_name> will accomplish this with ease.
To remove a container from your system, first ensure that it is stopped by executing the stop command, then proceed with docker rm . However, keep in mind that once removed, container data will be lost unless it is stored on a volume. Therefore, regularly check the status of each container using <container_name>docker ps to monitor active containers, or docker ps -a to view all containers, including those that are stopped.
Managing Docker containers on a Raspberry Pi requires special attention to resource allocation and performance optimization. It is crucial to regularly monitor container usage and system resources to prevent potential performance degradation. Consider using Docker’s built-in monitoring tools or integrating third-party solutions such as Portainer for a visual representation of container health and resource utilization. Additionally, you should adhere to best practices when deploying containers, such as limiting the number of running instances and ensuring that images are kept up to date. This proactive management approach will help in optimizing the performance of your Docker environment on the Raspberry Pi, ensuring a smooth and efficient operation of your applications.
Conclusion and Next Steps
Setting up Docker on a Raspberry Pi 5 is a rewarding venture that opens the gateway to numerous opportunities for containerization and application deployment. Throughout this guide, we have walked through essential steps, starting from installing the necessary operating system on your Raspberry Pi, to executing the Docker installation itself. This process empowers users to efficiently manage applications through containerization, simplifying deployment and scaling.
As you become comfortable with Docker on your Raspberry Pi 5, it is encouraged to experiment further with various Docker images and containers. The vast Docker Hub repository houses countless pre-built images, tailored for diverse applications ranging from web servers to databases, giving you the ability to adapt your Raspberry Pi for specific use cases. Engaging with these resources will not only enhance your proficiency in using Docker but will also provide practical experience that is invaluable for understanding container orchestration.
For those looking to delve deeper, consider exploring more complex applications that integrate multiple services. Tools like Docker Compose can be introduced to manage multi-container applications, which allows for a more sophisticated deployment strategy. There are also extensive educational resources available, including official Docker documentation, community forums, and various online courses that can assist with your learning journey.
Moreover, participating in community forums can provide support and a platform for networking with other Docker enthusiasts and Raspberry Pi users. Learning from shared experiences can offer new insights and troubleshooting tips, fostering a communal environment of growth and collaboration in the world of containerization.
In conclusion, the journey does not end with the installation of Docker on your Raspberry Pi 5. It is merely the beginning of a larger exploration into the capabilities that containerization has to offer. So, take the leap, experiment, and engage with the vibrant Docker community to expand your skills further.