
Are you weary of relying on the internet for all your entertainment? Ready to slash those subscription fees without giving up the joy of streaming your favorite shows? Plex has you covered. With Plex, you can manage your media library and stream to various devices with ease, requiring minimal setup and maintenance. It’s an outstanding choice for anyone looking to self-host their media.
For my setup, I sought a solution that was both cost-effective and power-efficient. I initially considered the Raspberry Pi 5 8GB, but I was put off by the limitations of only 8GB of memory and the ARM architecture. Instead, I opted for an Intel N100 mini PC from Amazon. I selected a model boasting 16GB of DDR5 laptop RAM and a 500GB SSD, more than sufficient to get started. The Trigkey G5 I chose also offers the flexibility to upgrade both RAM and storage effortlessly.
Hardware Suitability
The Intel N100 is praised for its balance of performance and low power consumption, making it an excellent choice for a 24/7 Plex server. Users have reported that the N100 can handle multiple transcodes simultaneously, thanks to Intel’s Quick Sync Video technology for hardware acceleration, although you might need a Plex Pass to fully utilize this feature. This processor has been tested to manage up to five 4K HDR streams with hardware tone mapping on Linux, but Windows users might face limitations with HDR content due to software tone mapping issues.
Operating System Selection
For running Docker with Plex, Linux distributions are generally favored. Ubuntu Server is often recommended for its stability and extensive community support, particularly with versions like 23.10 to ensure compatibility with the N100’s hardware transcoding capabilities. Debian is also a good choice, especially if you’re looking to integrate with other software like Open Media Vault for NAS management. Windows can be used, but Linux provides better performance for hardware transcoding, especially for HDR content.
Docker Setup
Docker allows for containerization, providing isolation for Plex which can make management, updates, and security easier. To get Plex running in Docker on an N100 Mini PC:
Install Docker using the instructions on their website: https://docs.docker.com/engine/install
Create your network
You may need to change the network settings to match yours, but for many the below command should work, just set the network name you desire.
docker network create -d ipvlan \
    --subnet=192.168.1.0/24 \
    --gateway=192.168.1.1 \
    -o ipvlan_mode=l2 \
    -o parent=eth0 <network_name>
Run the Plex container
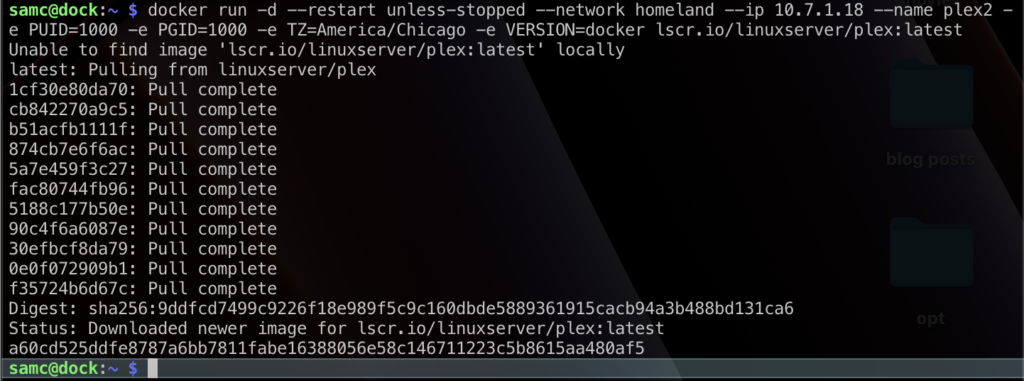
docker run -d \
--restart unless-stopped \
--network <network name> \
--ip 192.168.1.250 \
--name plex \
-e PUID=1000 \
-e PGID=1000 \
-e TZ=America/Chicago \
-e VERSION=docker \
-v /path/to/plex/db/config:/config  \
-v /path/to/tv:/tv \
-v /path/to/movies:/movies \
--device=/dev/dri:/dev/dri \
lscr.io/linuxserver/plex:latest
This is a long command, so let’s break down what we are doing.
First we will set up the basics for our container, including networking, a name, and a mode to start in (detached):
docker run -d: This will run the specified container detached from the shell.--restart unless-stopped: This will cause the container to restart if it goes down, unless you stop the container manually.--network <network name>: This specifies which network to use for this instance.--ip 192.168.1.250: We specify the IP address for this instance because docker allocates IP addresses sequentially when using ipvlan L2. This could cause collisions with your DHCP, to avoid that we assign an IP we know isn’t used.--name plex: This one is self explanatory, but we name the instance of our plex container.
Now we will set some environment variables that the container will use to configure things.
-e PUID=1000 -e PGID=1000: Set up the user and group to use for the Plex app. In my container this user and group were named “abc.”-e TZ=America/Chicago: I live in the Central Timezone of the USA, you can look up your timezone here: https://en.wikipedia.org/wiki/List_of_tz_database_time_zones-e VERSION=docker: This tells Plex we are running in a docker container.
Lastly, we set up our data persistence using volumes, and then finally we pass through the /dev/dri device so that our mini PC can take advantage of hardware accelerated transcoding.
-v /path/to/plex/db/config:/config: This is the directory used to store the Plex database. This is required if you want your Plex settings and metadata to persist.-v /path/to/tv:/tv-v /path/to/movies:/movies: This volume and the following volumes are used to point to where you store your media, in this case our TV shows and movies.--device /dev/dri:/dev/dri: This passes the/dev/dridevice through from the host to the container.
Setting up Plex
Now that you have your Plex container up and running, we can test out our connection to the Plex server, claim our server, and start loading our media into our library.
Testing our connection
Open up a browser and visit http://192.168.1.250:32400/web/index.html, where 192.168.1.250 is whatever IP address you assigned to your container in the previous step. My network is 10.7.1.0/24, so I selected 10.7.1.18 for this example.
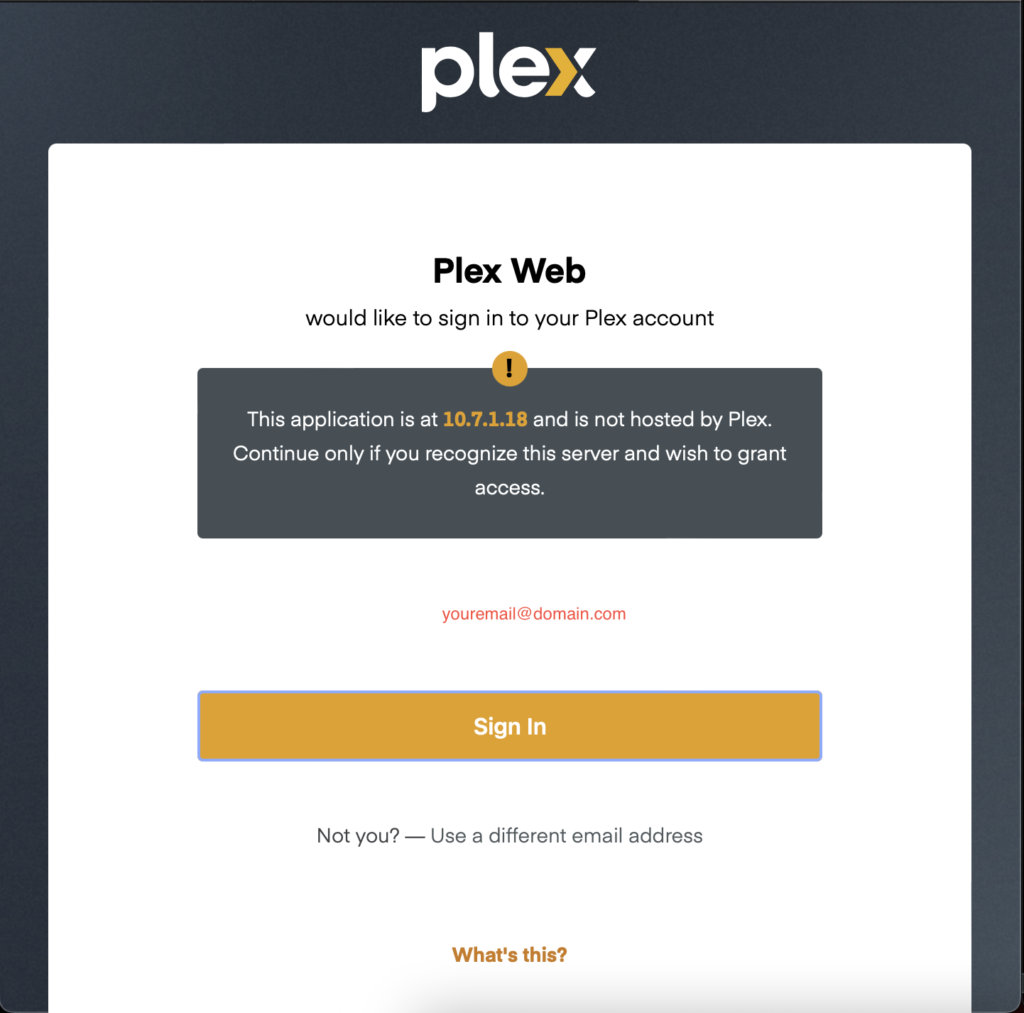
Connect your Plex Media Server
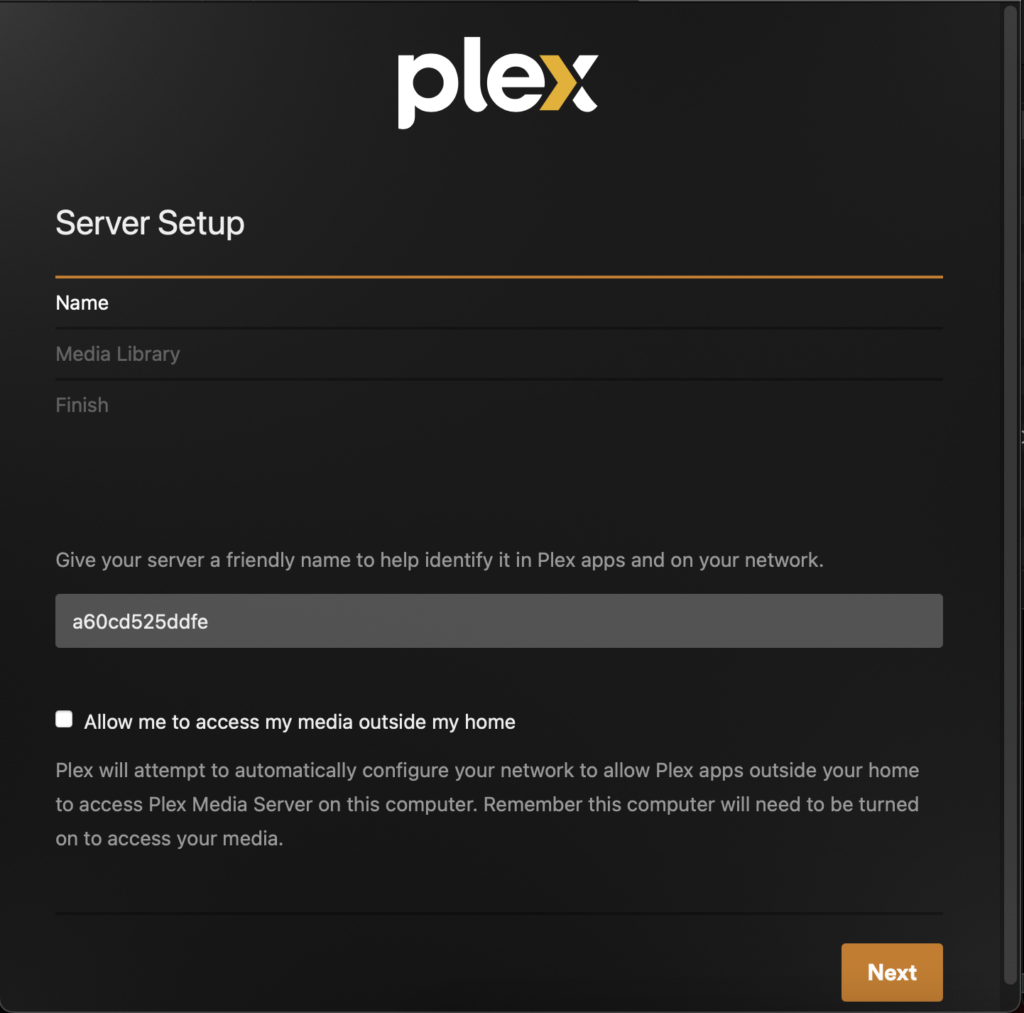
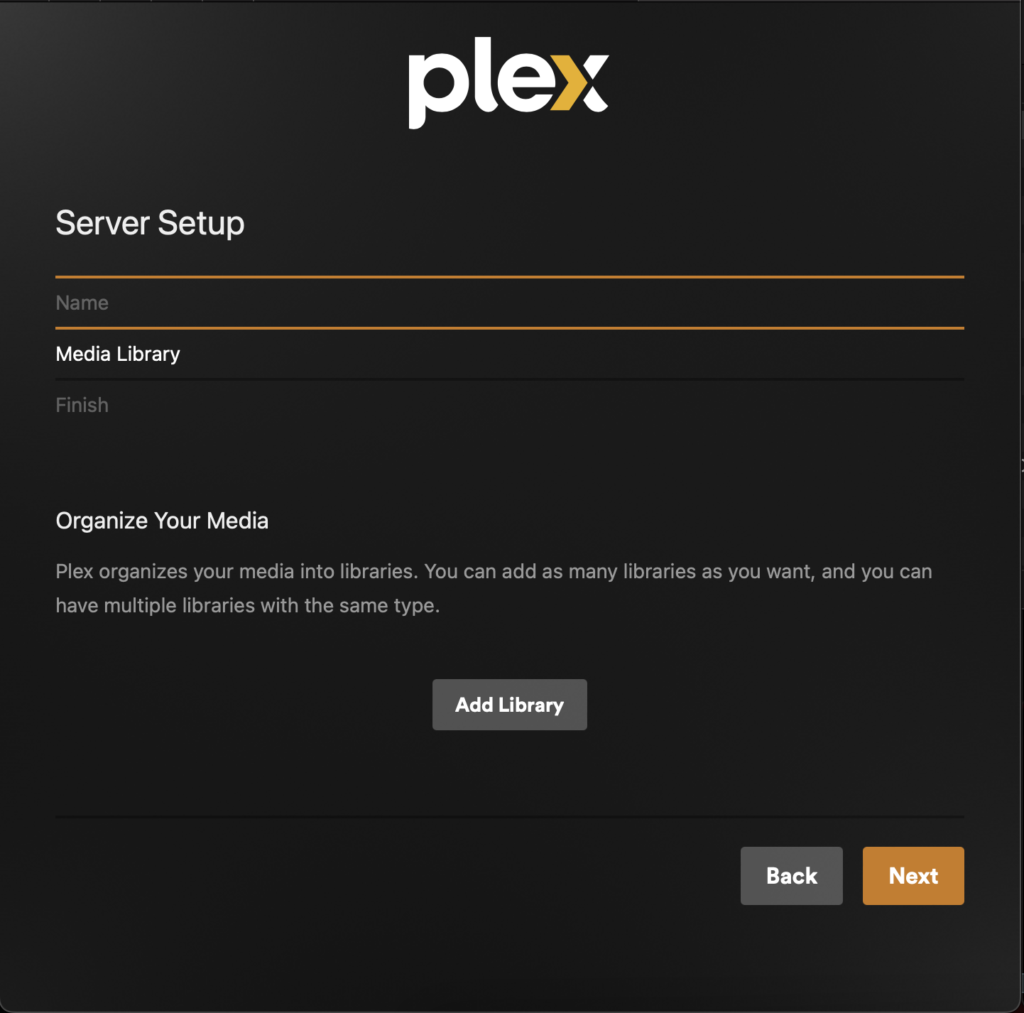
Give your server a friendly name to identify it and uncheck “Allow me to access my media outside my home.” That feature is beyond the scope of this guide. We will next configure the media libraries. For our example, these will be the /tv and /movies volumes. Finally, click done and Plex’s home page will load.
Claim your server
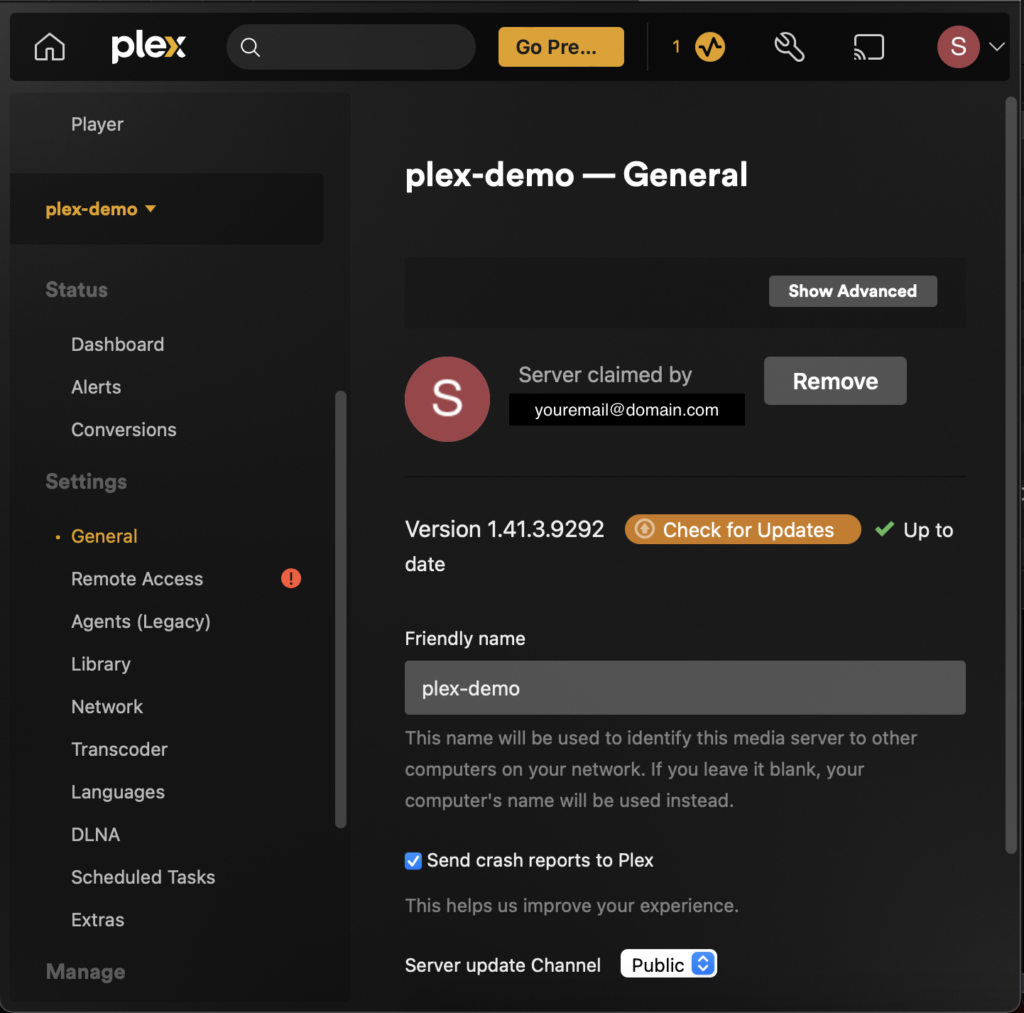
You will need to claim your server with your login in order to sync things to your account. The process is simple, login to your Plex web interface and click on the wrench in the top-right. This will take you to settings, then navigate to you media server section of the left menu and select General.
Load your media and start streaming
Copy your media into the mapped volumes on your host machine. In our example command these would be /path/to/tv/ and /path/to/movies/. You will then need to tell Plex to rescan your library files. You can configure the settings to monitor the library for changes, but for now, we can just manually scan when we add new media.
Conclusion
In conclusion, setting up your own Plex server with an Intel N100 mini PC not only slashes your entertainment costs but also gives you unparalleled control over your media consumption. Whether it’s managing your vast library of movies and TV shows or ensuring smooth, hardware-accelerated streaming, this setup proves both cost-effective and efficient. By utilizing Linux, Docker, and the power of Intel’s Quick Sync Video, you can enjoy a high-quality media experience without the ongoing expenses of multiple subscriptions. If you’re ready to take the leap into self-hosted streaming, this guide should provide you with a solid foundation to get started. Happy streaming!